Wednesday, July 10, 2013

Boat Family Shake-down

  So I've taken the boat out a couple times but hadn't had the nerve (confidence) to do it...until the wifey's birthday.  I rebuilt the carb and took a VERY quick crash-course in outboard motors...who knew there was something new to learn about engines?  I thought I'd seen it all with bikes, cars, and planes but these boat engines are a different breed entirely.  Anyway, I got the engine fixed up so it would finally start with one pull so I guess it was time to do the deal.
  So as I was saying, Joyce really wanted to take it out with the kids so we took it to Hayden Lake....and....


...see those smiles?  Yeah, it was a great time.  What I thought was going to be the shortest boat trip of all about 1 hour turned into over three!  Of course, the canopy was a big hit and helped a ton.


Tuesday, April 23, 2013

Update: Boat Canopy Frame Completed

  Sorry it took so long to update you on the canopy project, but things get uber busy about this time of year.  So I ended up getting some brackets made, though anybody could make some out of steel plate, angle, or channel of they wanted to.  I, unfortunately, have no time for such a thing...and I have no vice, which I kick myself for not buying every time I need one.  Aurgh...not having the right tools just blows.  Anyways, I digress...
  I do, however, have a few friends that are really good with machines that are willing to help me out with little project just like this one.  So here are the brackets on the verticals:

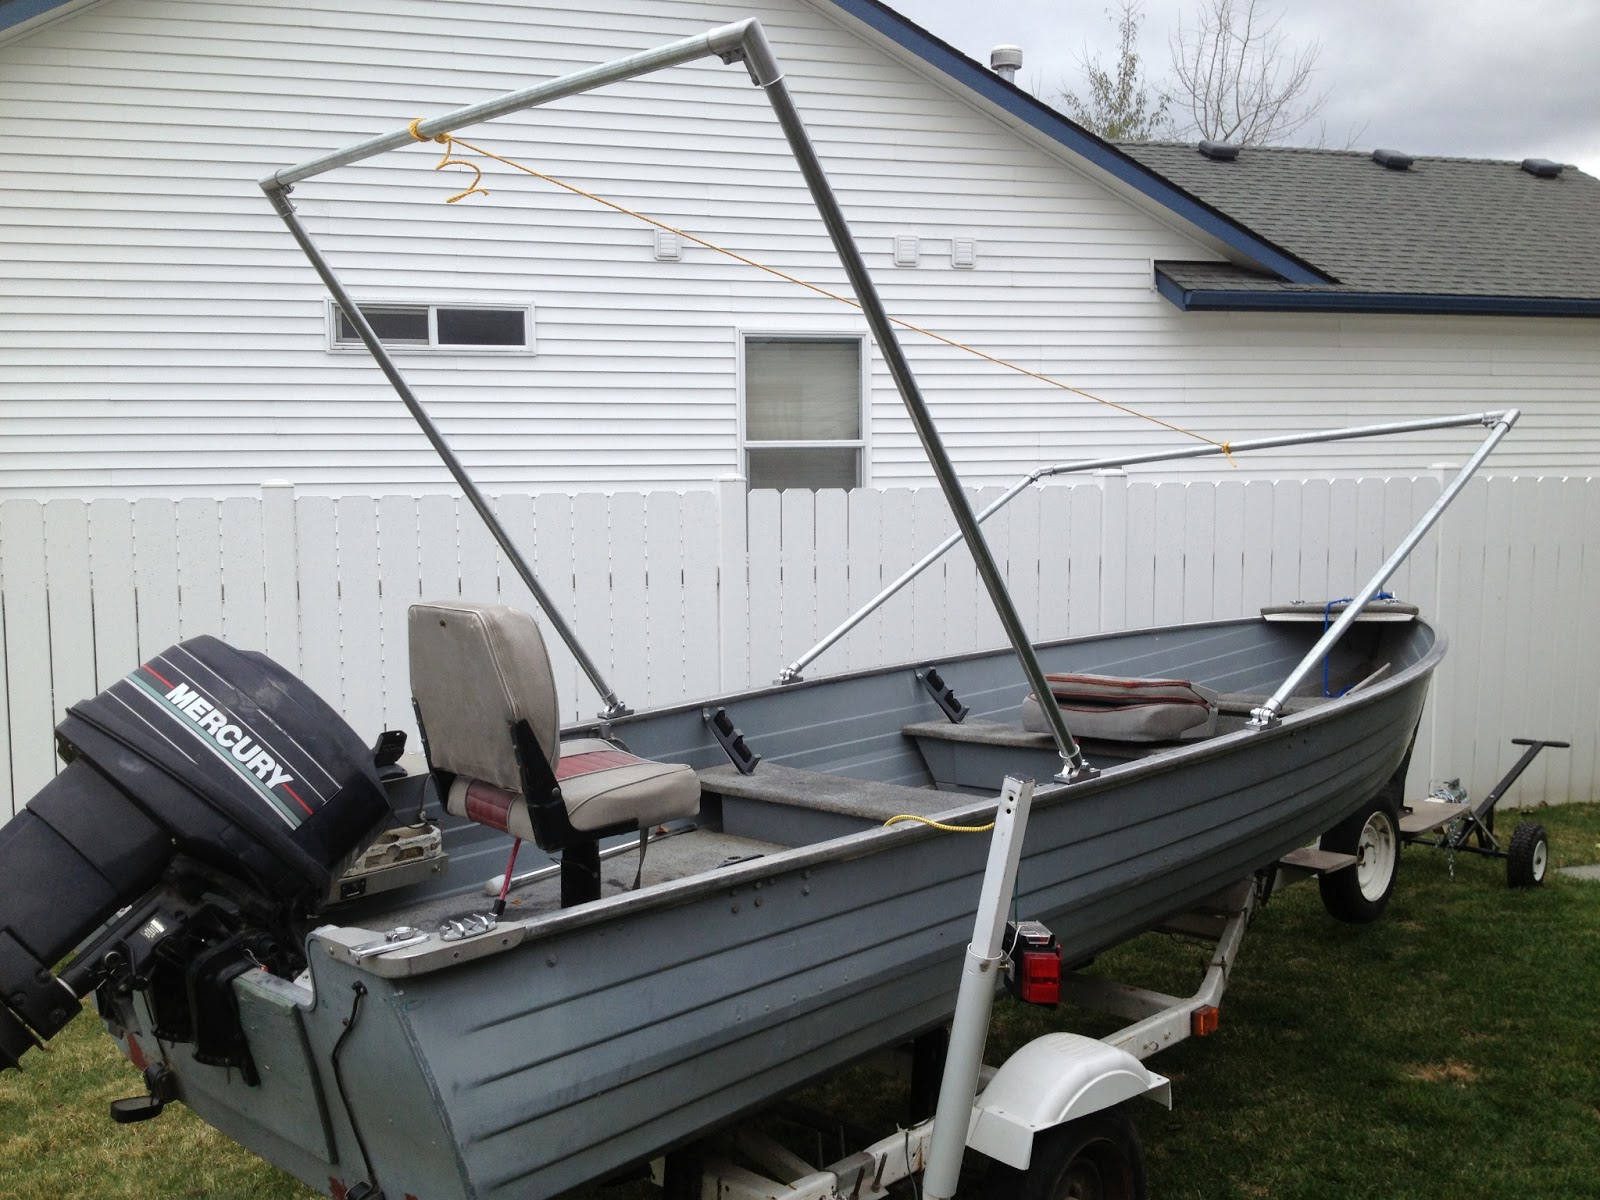
  And here is the finished frame mounted to the boat:


   The rope represents where the canopy will tie the two uprights together...
  It totally figures that the rainclouds were closing in pressuring me to get the boat covered, so I threw the tarp on it and pushed it to the side of the house (with the help of the wifey driving while I pushed, of course).
   ...and wouldn't you know it, she dun parked it good!  You should see her parallel park...no, really, she's actually pretty amazing...

Sunday, April 7, 2013

Geekin' out: DIY boat cover and canopy

  So I recently 'acquired' a 16' open aluminum fishing boat from my grandpa.  It took no more than five minutes to realize why I haven't ever wanted a boat before.
1)  They are money pits.
2)  There is always something that needs to be fixed, replaced, or upgraded.
  The great thing about the deal is that I'm only a few bills into the boat so I really don't feel like I need to spend too much time and money to keep it in the shape it's in.  Oh, yeah, and it floats and the motor works...I think.  The bad news is that it is in dire need of a re-wiring job, lights, and a cover.  Unfortunately, the place I planned to store the boat (next to the house on the north side) has no rain gutters whatsoever.  And it just so happens that it rained cats and dogs this week and I totally forgot that the north side of the house turns into a waterfall...right into the boat!  Ooopsie.  After I pulled the drain plug at the transom and watched four inches of water pour from the deck of the boat it became apparent that priority numero uno this weekend was to get the damn thing covered.
  Being the perfectionist and geek that I am it was obvious (at least to me) that I needed to model this contraption, make drawings, and find a way to make it as cheap and strong as possible (that part was probly my enginerd side of me).  So there I was, sitting in the boat in the rain under the waterfall waving around a tape measure like a dork imagining what it was to look like...I was totally stoked that I was actually going to get a chance to build something again.  After a couple hours of these shenanigans I had a decent model and drawing...BTW...I have to say it was SOOOO easy to do this in SolidWorks.  Too bad I only get to do this at home on the weekends....but I digress...
   okay, okay, it's not totally professional looking but it got the job done. After some more looking on boat blogs I found an amazing amount of clueless dudes totally willing and expecting to blow huge amounts of dough on these things...most didn't even bat an eye at dropping $700 for a cheap one.  Holy crap dude...the boat and trailer didn't even cost me that!  I vowed to do this thing, and do it well.  I made some goals:
1)  Make it strong enough not to rip off when traveling at near-top speed (cuz' let's face it...that would just be embarrassing).
2)  It has to be big enough to provide shade and rain cover for the whole family (happy wife happy life)
3)  Use all purchased parts (I'm getting lazy in my old age)
4)  Do it for no more than $100 (I'm getting cheap in my old age too)
  Yeah, the last one was a bit iffy, but I was damned if I was going to put too much into a fancy boat umbrella.  The next step was to figure out what to make it out of.  There are a few guys on youtube that have made a canopy with PVC pipe on the cheap, but my enginerd side overrode the north-idahoan in me that said PVC would be cheap and easy...I could do better...much better. My original idea was to use galvanized electrical steel conduit, but I couldn't find 1" elbows and 3/4" just didn't seem big enough.  Then a dude at the local hardware store pointed me in the direction of the fencing isle...and wouldn't you know it I got one of those ideas, you know, the kind that gets you all giddy inside like you just found treasure?  Galvanized chain link fencing uses 1-3/8" thin-walled galvanized steel tubing (don't even have to paint it!), and has all KINDS of tees and elbows ready-made.  PERFECT!  All the hardware cost about $75, which was more than I expected but geeze it was going to be easy.

Attachment hardware to boat -bracket still required

Elbows for upper 90 of frames

Frame material

 I got it all home and within an hour I had the tubing cut (the $5 cut-off wheel for my circular saw made this a breeze) and the frames were put together ready to mount to the boat...and that's where it got a little more difficult.  I looked at all sorts of brackets at the hardware store, but nothing really fit right.  No matter what I found it needed major modification to work, so I punted on goal #3 and decided to make my own bracket.  Sunday night and the boat still isn't covered.  Not what I wanted but it's what I kinda expected.  I should be ready to install tomorrow...more to come!


Friday, March 8, 2013

My little artist

  So it turns out that boys find trouble a lot more than little girls, at least this is my experience.  The other day Joyce went downstairs to get Claire after some visitors had left.  One of the visitors was using a pencil to do a crossword puzzle and left it on a stool.  Yeah, I probably already gave it away....JJ found it and started practicing on the wall:
...and this shows only half of what he did.  Good for us though, our neighbor told us about Magic Sponges made by Mr. Clean.  These things ROCK!  It took seconds to do what was shown after using an erasure on the other half for about half an hour.  Big thumbs up to the Mr. Clean peeps!

Score update: JJ's Face=0 Floor=1

  I have a friend that gave me the advice to make sure to capture as much of my kids' life as I can...especially the boo boo's.  He said, "...it's not very funny at the time, but a few years later it get's a chuckle!".  It just so happened JJ gave me the perfect opportunity the other day when he fell in the garage.  He was riding is tricycle when the front wheels stopped and he kept going....unfortunately I think his face met the kickstand of my motorcycles as well...
...the little bugger wadn't happy at all...
   Poor kid, his lip swelled instantly...
...gotta admit though, he's still pretty cute with a fat lip!

Sunday, January 6, 2013

Delta Pusher Foamy Build

    In an endless quest to find another way to fill my ever-dwindling free time, I have picked up another hobby.  Actually, this hobby started when I was much younger but never really 'took off'...hee hee..oh...you don't get the pun yet...
Top View, with servos

Bottom side
   This is my new radio controlled delta wing...well the beginning of one anyway.  I got the idea from my parents who had seen some 'lights in the sky' one night while drinking on their deck.  No, not a UFO, but a neighbor dude that was flying something similar with LED strips on it so he could fly it at night.
  I've had a glider and a trainer hanging from my ceiling since....well...I was like twelve and never got the ca-honeys to fly them in fear of endowing $ into the ground, a tree, or even worse a house.  After doing some searching on the interweb I found some videos on building one of these little jobbies out of foam boards from Micheal's and Home Depot.  The video can be seen here.  So my hope is this: between flying a few of these into the ground (buying the farm - thanks Mr. Yeager!) and terrorizing the cats, dog, and wife with my Christmas present to me:
..dammitt...blogspot turned the pic again...sorry for the crink in your neck!
  I'll keep you all updated on the completion of the delta wing!

Monday, December 31, 2012

Flooring Remodel - Merry X-mas, to us!

  In an effort to make our house a little more 're-sellable', I decided that I really wanted to replace all the really worn carpeted areas of our house with wood laminate.  This idea was spawned by a flooring replacement I helped my father-in-law with at the family cabin.  Seeing how easy it was to install (even with un-square 1930's - built pole walls) and the cost really made me want to do this in my house.  Also, anybody that has carpet in a dining room...especially with kids...is just retarded.  The carpet get's gross and starts spawning all sorts of groadies that cannot be cleaned out.  Not only that, but the carpet get's really threadbare and un-stretched in highly traveled areas.  Take a look at a few of the 'before' pics:


  So given the flooring I'd done before I figured the main floor would take a day.  The next morning I got started by with a trip to Home Depot to pick up a kick-ass Ridgid 10-inch Sliding Compound Miter Saw.  I hate dropping this kind of dough, but I kept telling myself that it will pay for itself in this project and any project in the future.  And let me tell you, it was well worth it!  I non-sliding single-bevel saw just wouldn't have cut it.
  So I returned home eager to get this project done...
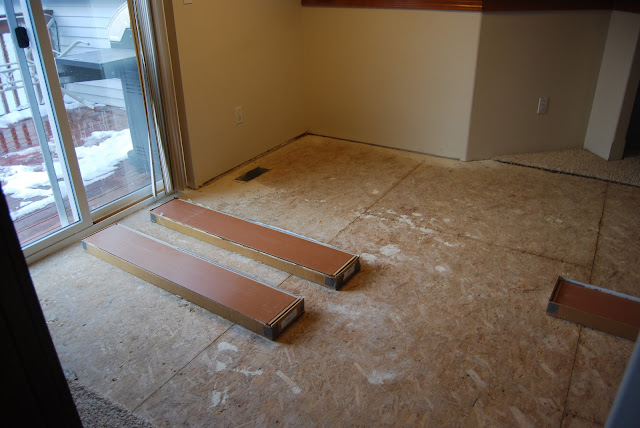
Cleaned up and ready to go...

  ...anybody that has done this before can tell you, starting is the hardest thing to do!  I kept asking myself, 'which way does this thingy need to go????  Once started, it went pretty quick.  By 10:00 it looked like this:

Latte checkin' my progress...
Watching Daddy work

My foreman busting my balls..."you sure you know what you're doin'?"
  So the first day went pretty well, I got most of the main floor done and I was thinking I was going to be finished right on schedule...then I started the stairs.  OMG, NOT FUN!  It took me an entire day just to get the treads ready for the laminate!


My handy-dandy nose-trimmer jig thingy

  When using laminate, the 'nose' of the stair must be trimmed flush with the 'kick' board of the stair.  I used the jig pictured above to transfer the line of the stair from the bottom of the tread to the top.  Originally, I used a circular saw to make the cut, but realized after that it took me an hour to cut the ends of the tread and clean up the edge.  That wasn't going to do it for me, so I fell back on plan 'B' and tried using a Reciprocating Saw I got on sale at Harbor Freight.  That was the ticket!  Any clean-up of the edge was quickly done with my trusty Oscillating Power Tool that was a gift from my father-in-law a couple years ago...thanks Kent!  I can't tell you how great this tool is!  Aside from the gripes about dust being everywhere, this was starting to go smooth!
  So by the end of the second day I only had the stairs ready to start work on.  On Christmas Eve, I cut and fit the treads and it looked like I was going to finish today.  I finally got everything fit and started gluing and nailing the laminate at about 7:00...and then I ran out of glue!!!!  Aaaurgh!  Thinking Wal-Mart was open 24-7, I made a mad dash to get some glue.  Come to find out, they close at 8:00 on Christmas Eve...just 20 minutes late.
  Defeated and tired (mentally and physically), I returned home to my un-completed stairs...it's almost as if they were mocking me, "...and you thought you were going to finish us....ha ha ha, you silly little man!  Now you have to look at us for a whole day before you can even touch us again!  We Win!!!".  Stupid stairs...
Mocking stairs
  The day after Christmas, I completed the stairs, trim, and moulding.  And I have to say, it was well worth it!
Conquered stairs

Finished dining room, from living room

Dining room, from kitchen


Hallway to bedroom and bathroom


  When all said and done, the whole project cost:
Flooring, trim, and pad: $390
Time: 3 Days
Tools: I'm not going to get into this...but the tools cost more than the flooring and time.  And tools last a lifetime!

  All said and done, my wife and I started to wonder why we didn't do this sooner.  I'm a little bummed that we aren't going to be able to enjoy the floor for much longer (if the house sells).  I will also have to say this project really made me hate my desk job...I was sore and stiff for the next week!